How to Add Icons to Your Form
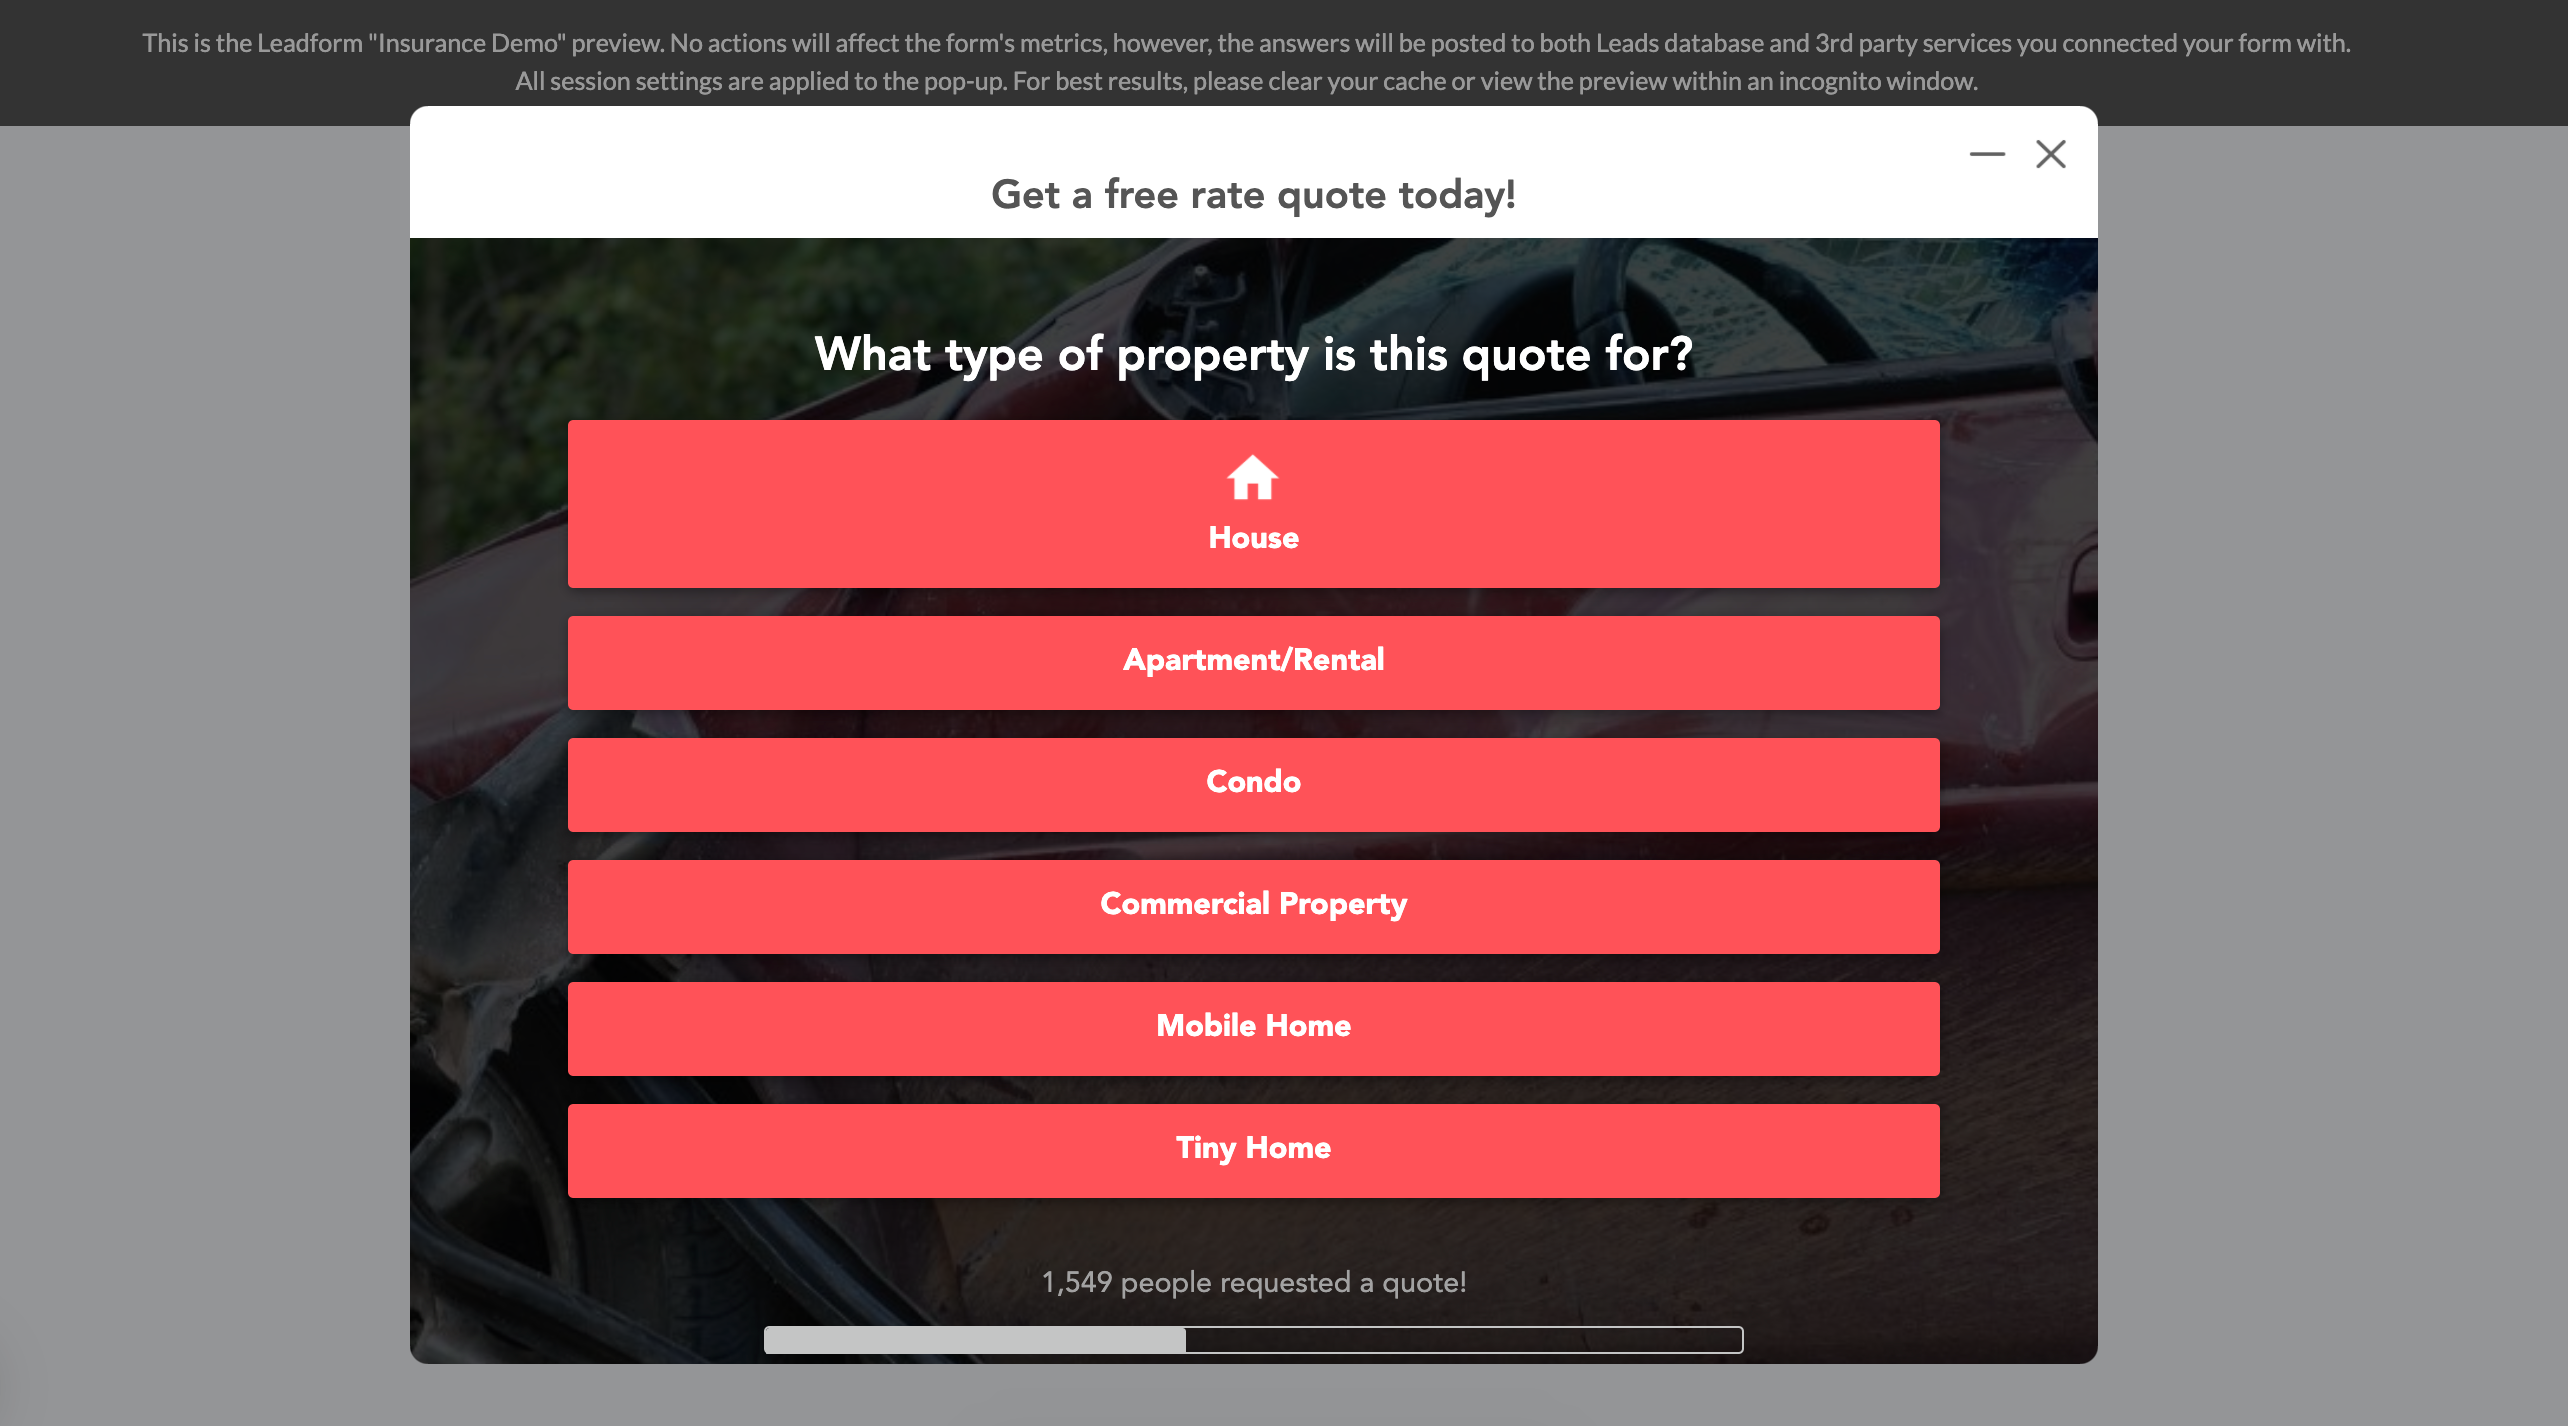
With LeadForms, you can add icons to your form's responses so it looks something like the image below:

At this current moment, you will need to provide your own icons. At some point in the near future, we may build an icon-library into LeadForms. But for now, all icons must be uploaded as a PNG, JPG, or SVG file.
The Short Version:
To add an icon to your form, all you need to do is open the step that you'd like to add the icons to and click the icon symbol on each response. Upon clicking the icon symbol, an icon upload screen will open up. This is where you will upload your icon, set the position and size.
The Long Version
Want to dive deeper into how this all works? Keep reading!
Where to Find Icons
Here are two of our favorite places to find icons:
1) Flaticon.com (our top pick) - Simply find an icon, download it to your computer and then upload it to your form. https://www.flaticon.com/home
1) The Noun Project: You can access millions of free icons or unlimited royalty-free icons with the noun project: Here's the link: https://thenounproject.com/:
2) Canva: Canva is one of our favorite places to quickly design backgrounds and icons for our forms. Here's the link to Canva: https://canva.com
How to Add Icons
-
You'll need to access the step that you'd like to add the icons to. To do this, open your form and go to the "Steps" section of your builder.

-
Next, you'll need to select the step that you'd like to add the icons to. In this example, we're going to add icons to the property type step. So I selected, "property type" to open the step options on the screen.

-
Upon opening the step, you'll notice that each response type on the left hand side of the screen has a little icon image next to the edit (pencil) icon. To add an icon to each step, you'll simply click on the image.
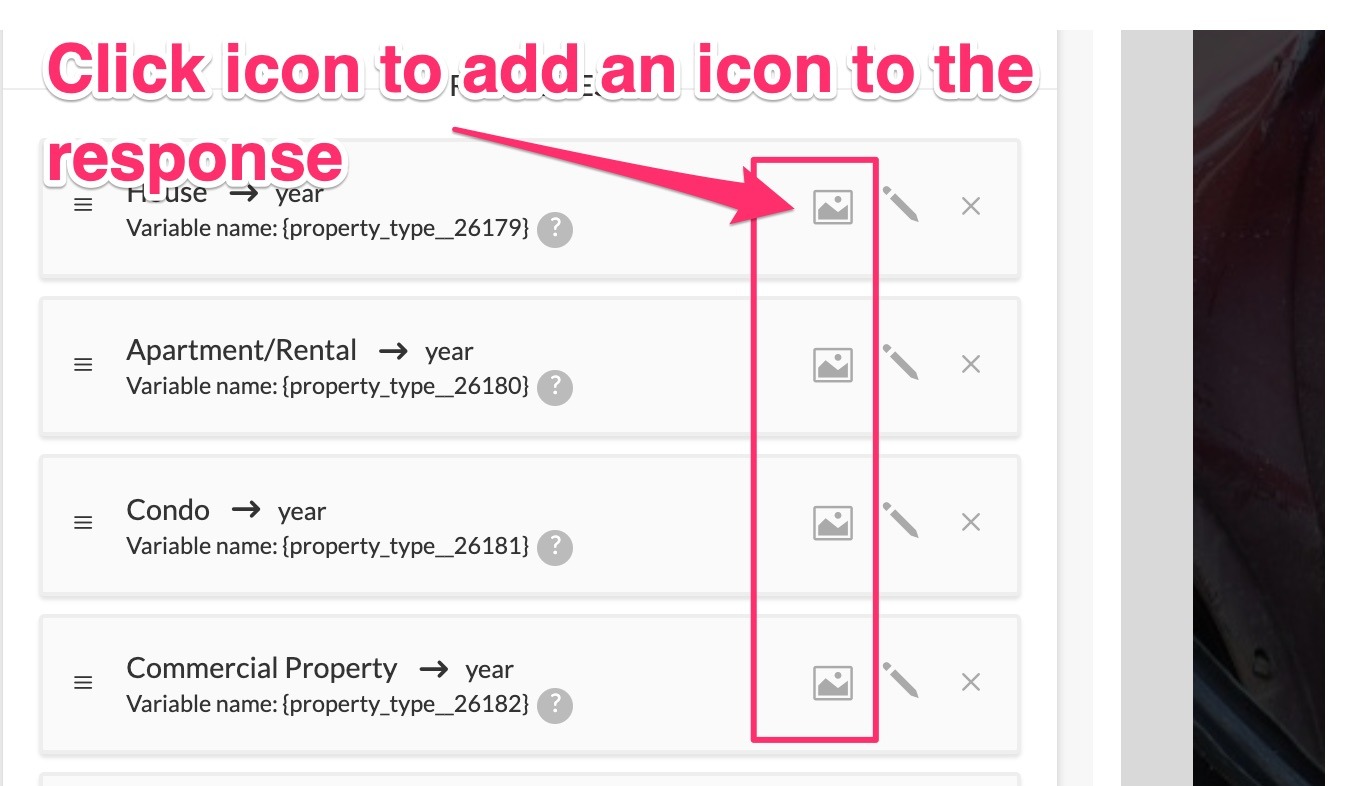
-
Let's add house icon for the first step "House" -- To do this, simply click on the icon in the house step. This will open up an area to upload an icon.
-
An Upload/Edit Icon Area will expand on the screen. This is where we will upload our house icon. You also have a number of additional options. You can set the size of the icon on desktop & mobile, as well as set the position of the icon to either be at the top, bottom, left, or right of the button.

-
Now let's upload our icon. In this example, I created a house icon in Canva and downloaded the image as a transparent PNG to my desktop computer. In this case, I'm adding a white icon to a red button. When uploading your icon, you'll either need to match your icon's background color to the button's background color, or download an icon with a transparent background.
Here's how the button looks after the initial upload (it needs to be resized)

-
Since this icon HUGE, I'm going to resize it. To do this, I'll simply click on the same icon again to expand the icon options and set the icon height on desktop to around 30px.

-
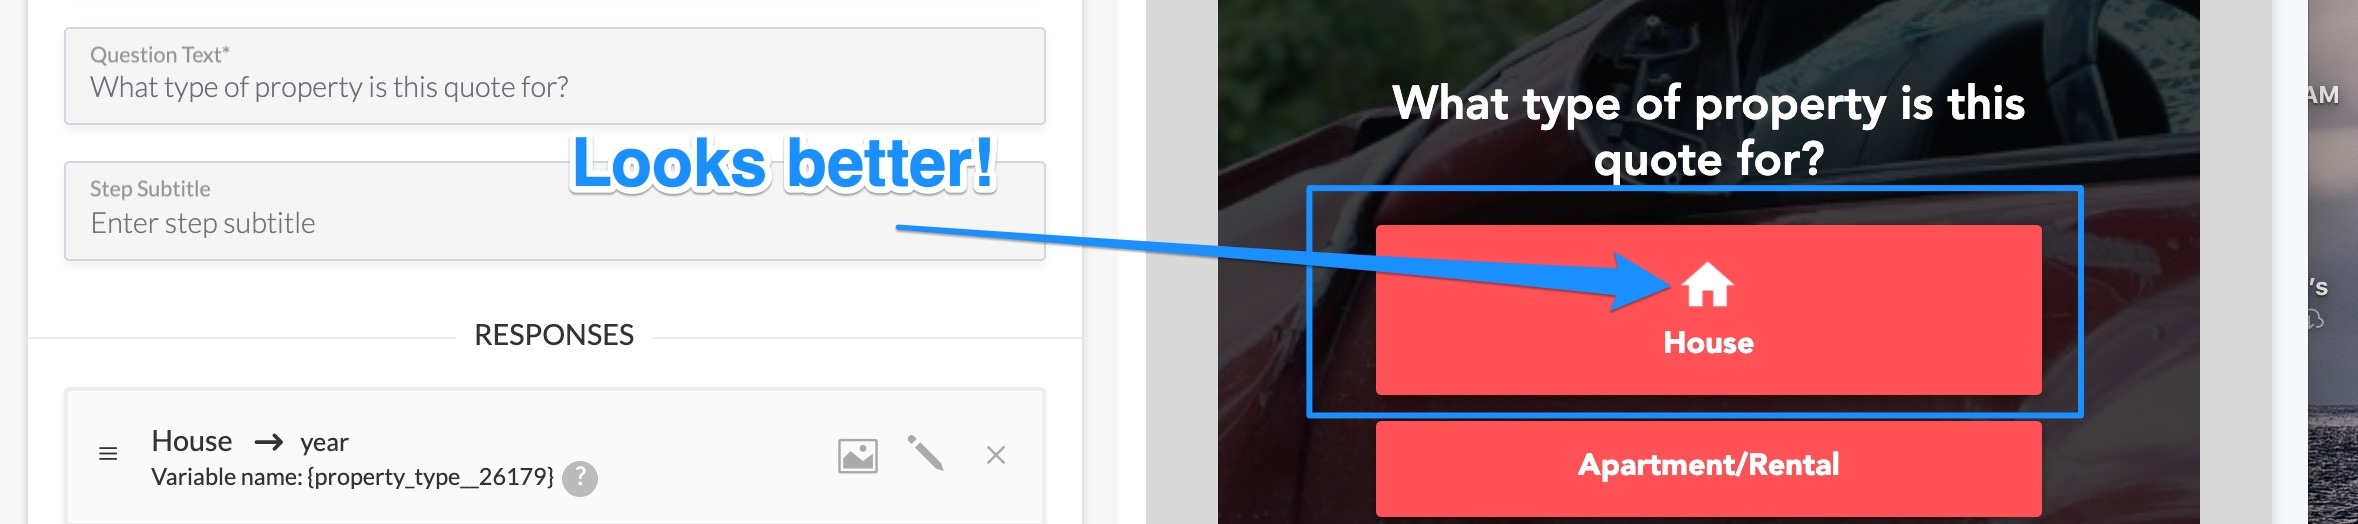
Click Save and check the form - it's looking pretty good now!
-
If you want the icon to be positioned to the left of the text, simply set the position to left.
-
Since the form real-time editor is not to scale , you'll want to preview the button on a full size form. To do this without adding the form to your site, simply click the preview button

-
Clicking Preview will open up your LeadForm and you'll see the icon on a form that's to scale.
-
Now we just need to finish adding icons to the other buttons in the form. To do this, just go back to your step and repeat all of the steps above.
Icons + Your Form's Layout
As a result of adding icons, your LeadForms buttons are going to become taller. This means that it will become harder to fit more potential responses in the main view, without requiring the prospect to scroll if you're using a 12 column response grid width. In other-words bigger buttons = less space.
In some cases, it may make sense to transition to more of 3-4 grid based layout like this:
To accomplish this, you can override a specific step's layout by scrolling down to Advanced Options, then expanding "Step Layout Override" - Try changing the column width from 12 to 4. You'll need to play around with this a bit.

You can also find this setting in the Design area of the form builder under Response Grid Width - adjusting this will apply the width to all steps globally.
If you run into any issues or need help, just let us know and we'll be happy to help you out.